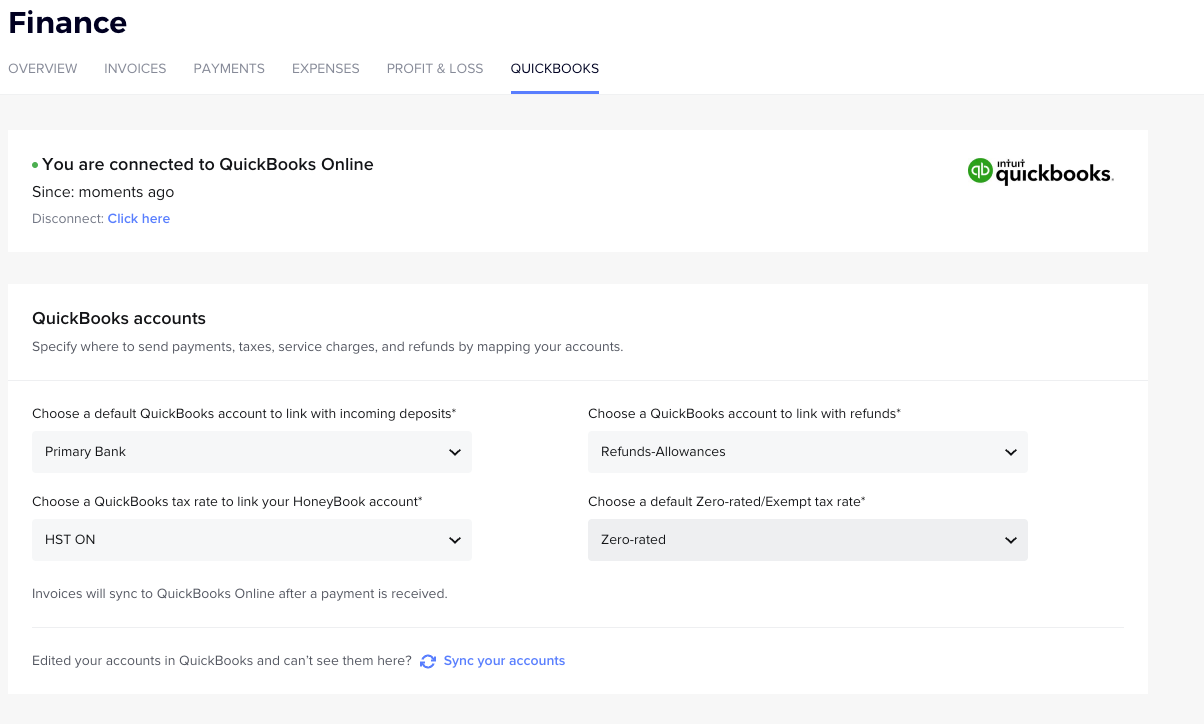


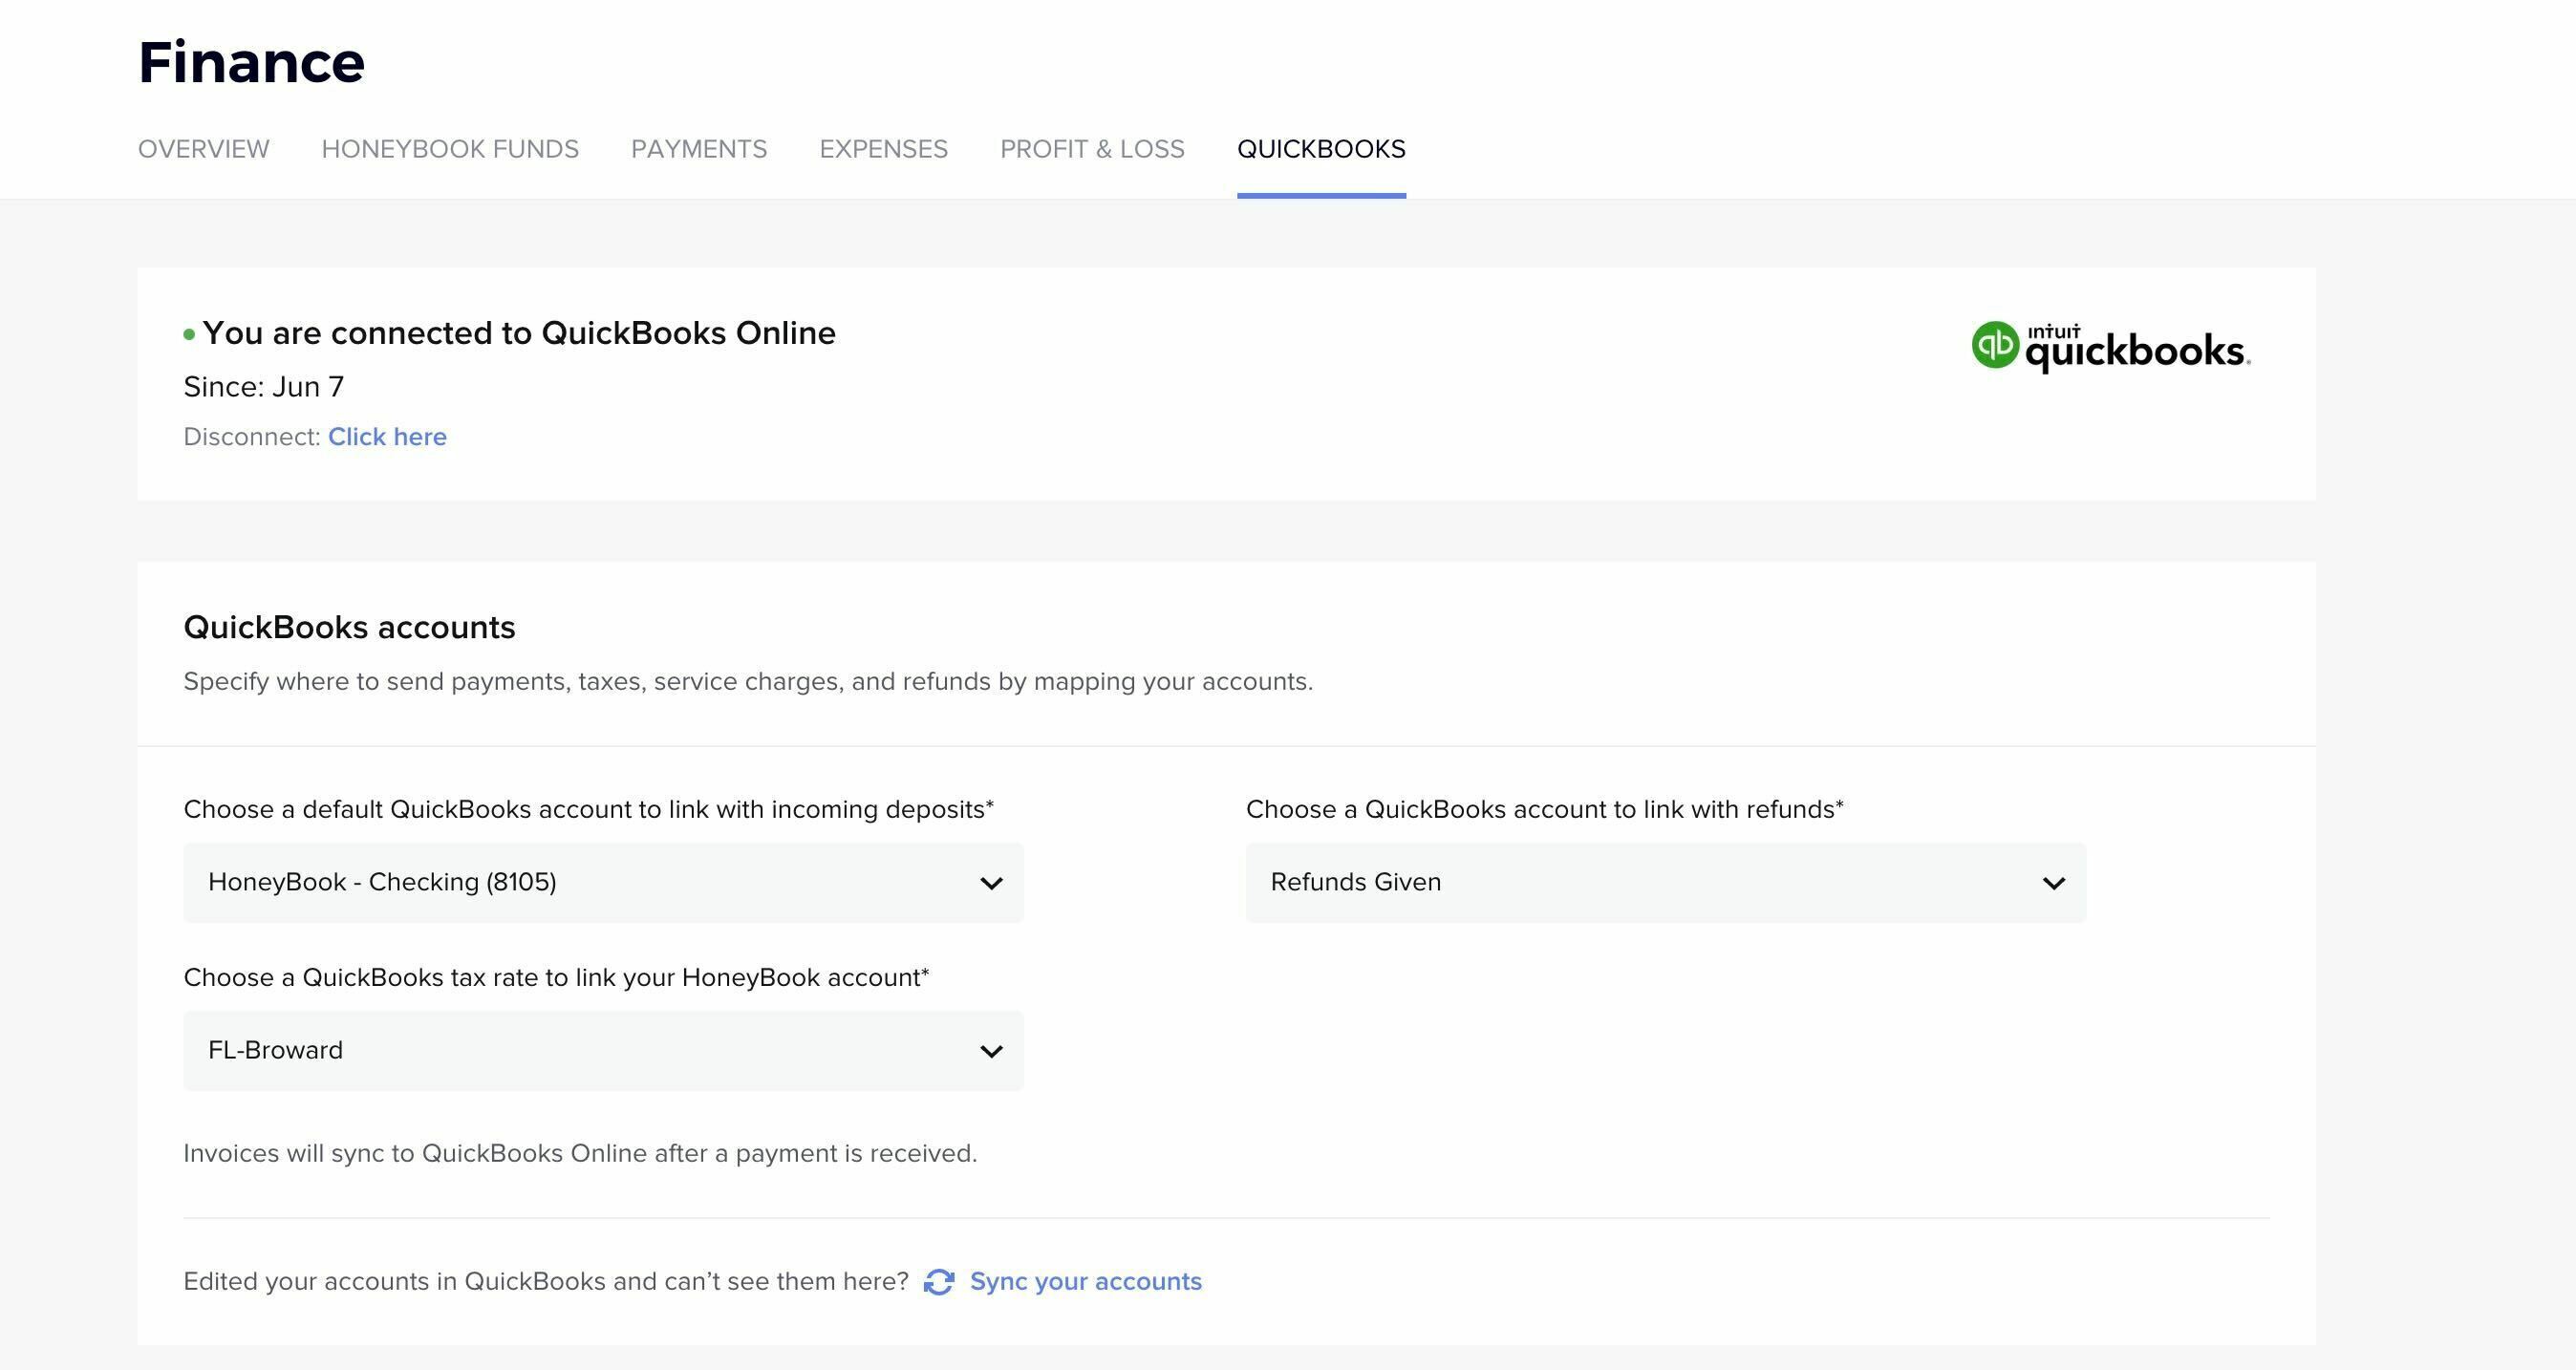
How to Use the New HoneyBook QuickBooks Integration Dashboard
The new HoneyBook QuickBooks Integration Dashboard provides enhanced control over how your invoices and data flow between HoneyBook and QuickBooks. Here’s a guide to help you navigate and utilize this new dashboard effectively.
1. Connection Status
At the top of the dashboard, you’ll see the connection status, indicating that your HoneyBook account is connected to QuickBooks. You’ll also see the date of your last connection, which is important as it determines the date from which new invoices and payments will sync with QuickBooks. Any payments received before this date won’t be automatically synced.
2. QuickBooks Accounts
This section allows you to customize your QuickBooks experience by selecting the appropriate accounts for various transactions:
- Default Bank Account: Select the account where payments from invoices will be deposited. This account will be automatically matched to the invoices being synced.
- Refunds Account: Choose the QuickBooks account to link with refunds. This ensures that any refunds issued will sync over to QuickBooks and match the corresponding invoice. Please note this account must be type “Refunds” in QuickBooks.
- Tax Rate: Set your default tax rate based on your location. If you’re a Canadian member, you’ll also have the option to set a zero-rated or exempt tax rate.
If you’ve recently created new accounts in QuickBooks and don’t see them in the dropdown menu, simply click “Sync Your Accounts” to update the list.
3. QuickBooks Settings Indicators
The dashboard includes indicators for two important QuickBooks settings: Tips and Discounts.
- Tips: If you accept tips from your clients, make sure that tips are enabled in your QuickBooks account to sync them properly.
- Discounts: Similarly, if you offer discounts, they need to be enabled in QuickBooks to ensure they sync correctly.
While you can’t control these settings directly from HoneyBook, the dashboard will show you whether they are turned on or off in QuickBooks. To make changes, click “QuickBooks Settings” to access your QuickBooks account settings.
This updated dashboard is designed to give you greater flexibility and control, ensuring your financial data flows seamlessly between HoneyBook and QuickBooks
9/4 Update: Previously, Service Charges Account appeared on the dashboard. Based on feedback, it has now been removed from the dashboard. To account for service charges, you can use the service mapping feature within an invoice to map the service charge to the correct account.
Here are images of what the dashboard looks like!
American HoneyBook <> QuickBooks
Canadian HoneyBook <> QuickBooks