

We are out of beta and live to all members!
The HoneyBook pay link is a streamlined feature designed to help HoneyBook members request and receive payments quickly without the need to set up a full project. This feature is ideal for simple transactions, one-off services, or when a client prefers a straightforward payment process. The pay link is valid for 24 hours and can be shared via email, text message, WhatsApp, or other messaging platforms.
Key Features
- Quick Payment Requests: Send a payment request quickly and easily.
- No Project Setup Needed: Ideal for simple transactions without the need for a full project
- Multiple Sharing Options: Share via email directly from HoneyBook or copy the link to send through other platforms
- Payments Tracking: Monitor the status of your Pay Links within the Client Workspace
- Secure Payments: All transactions are processed securely through HoneyBook's payment system
- Single Submission Security: Pay Links can only be submitted/paid once, ensuring secure transactions
- Merge Existing Project: If client has an active project, you can merge the link to an existing project
- New Client Functionality: From the dashboard, you can make an instant link for a brand new client
How to Create and Share a Pay Link
Step 1: Create the Pay Link
- Access the Pay Link Feature:
- Navigate to your Client Workspace for the specific client you want to request payment from.
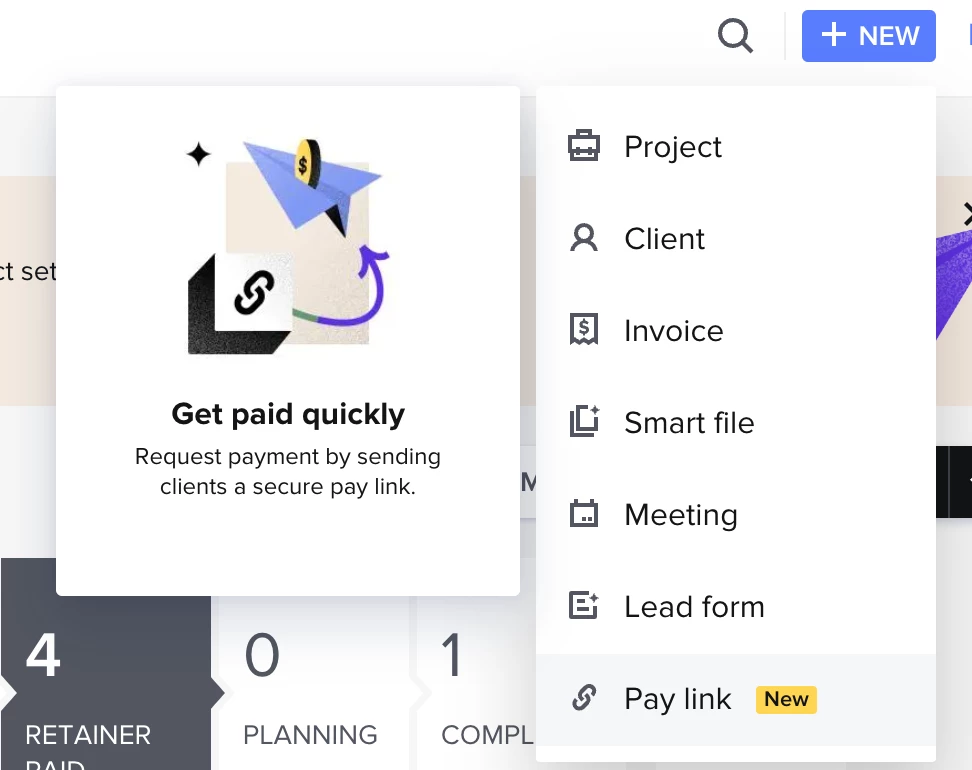
- Click on the Create Pay Link button located in the Pay Link widget on the right sidebar.


OR
Select +NEW from your top nav
- Enter Pay Link Details:
- Client:
- The client will be pre-selected since you're in their workspace.
- To change the client, click on the client's name and select a different client or add a new one.
- Amount:
- Enter the amount you are requesting.
- Example: $150.00
- Pay Link Name:
- Provide a name for the Pay Link to help you identify it later.
- This name is also visible to your client.
- Example: Consultation Fee
- Allow Tip (Optional):
- Toggle on Client can leave a tip if you want to allow clients to add a tip during payment.
- Create the Pay Link:
- Once all details are filled in, click Create Pay Link to proceed.
Step 2: Share the Pay Link
- Choose a Sharing Option:
- Send via Email:
- Click Send via Email to send the pay link directly to the client's email.
- An email draft will appear for you to review and customize if needed.
- Copy Link:
- Click Copy Link to manually share it via text, WhatsApp, or other messaging platforms.
- Send via Email:
- Complete the Process:
- If Sending via Email:
- Review the email content.
- Click Send to deliver the pay link to your client's inbox.
- If Copying the Link:
- Paste the copied link into your chosen messaging platform and send it to your client.
- If Sending via Email:
- Confirmation:
- A confirmation message will appear, letting you know the pay link has been created and is ready to be shared.
Managing Pay Links
Viewing Pay Links
- Access Your Pay Links:
- Go to the Client Workspace to see the list of pay links associated with that client.
- Pay Links are displayed in the pay link widget on the right sidebar.
Understanding Pay Link Statuses
- Active:
- The pay link is valid and awaiting client payment.
- Paid:
- The client has completed the payment.
- Note: Actions in the sidebar for Paid pay links are currently disabled and will be implemented in future updates.
- Expired:
- The 24-hour validity period has passed without payment.
- Refunded:
Actions Available
- Active:
- The pay link is valid and awaiting client payment.
- Paid:
- The client has completed the payment.
Note: Actions in the sidebar for Paid pay links are currently disabled and will be implemented in future updates.
- The client has completed the payment.
- Expired:
- The 24-hour validity period has passed without payment.
- Refunded/Partially Refunded:
- The transaction was refunded or partially refunded. Funds will be returned in 7–14 business days (same as standard invoice refunds).
Deleting a Pay Link
- Locate the pay link you wish to delete in the pay link widget.
- Click on the Delete option next to the pay link.
- Confirm the deletion when prompted.
Note: Deleting a pay link is permanent and cannot be undone.
Client Experience
- Receiving the pay link:
- Clients receive the pay link via the method you chose (email or messaging platform).
- The message includes the pay link name, amount due, and a secure link to make the payment.
- Making a Payment:
- Clients click the link and are guided through a simple payment process.
- They can review the payment details before proceeding.
- If you enabled the tip option, clients can add a tip after entering their payment information.
- Payment Confirmation:
- After completing the payment, clients receive a confirmation message on-screen.
- They also receive a receipt via email for their records.
- Once the payment is completed by the client, members will also receive a confirmation email.
- Security:
- All payments are processed securely through HoneyBook's encrypted payment system.
- The pay link can only be submitted once. After being submitted and paid, the lead form is deleted and cannot be accessed by clients anymore.